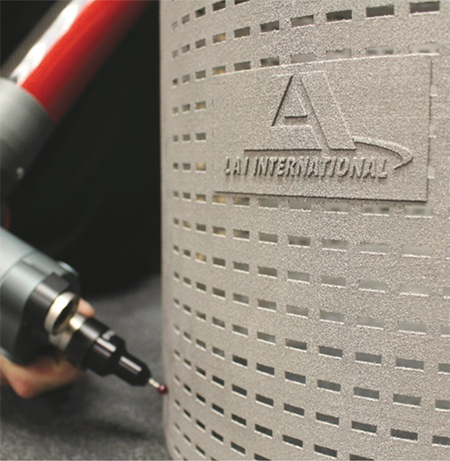
When demonstrating the ability to meet customer requirements, AM contract shops employ an array of conventional inspection techniques, including dimensional inspection through a CMM or structured-light, 2D or 3D radiography, fluid-penetrant inspection, microstructural evaluation and proof tests. However, these tests can prove expensive and time-consuming—customers considering AM for speed and cost benefits may find that inspection requirements can ruin the business case. Fortunately, though, AM processes can provide additional data that conventional manufacturing processes cannot provide, data that can be leveraged to offset some of the inspection needs.
For example, most AM equipment generates data prior to the build, during calibration and setup, as well as during and after the build. This data can come in the form of text, csv, image or PDF files, depending on the platform being used for production. The challenging question: How does the AM shop use all of this data?
 First and foremost, shops should put a robust data-collection and storage system in place that can capture all of the data and correlate it back to a specific build, as well as to each part within a build. Then, shops can analyze the collected data, in a meaningful way, using a handful of available tools, such as statistical-analysis software that can analyze large datasets and identify correlations. This exercise can be extremely useful and save an AM shop a lot of time and effort. Many companies also are developing their own analysis software specific to AM technologies.
At this point, the AM shop may have collected a lot of data and performed some amount of analysis. How, then, can it use the data to ensure consistent quality, as well as save time and money? This exercise hinges on the analysis of key process variables (KPVs)—the characteristics of the process that directly impact build quality. A producer must combine the information received through conventional inspection techniques with the output from the in-process data analysis to find correlations and identify which characteristics are true KPVs.
With the KPVs identified, the job then turns to establishing allowable values and tolerances for each KPV, and employing statistical process control (SPC). Shops can apply SPC in a variety of ways, but the most useful application initially rests on the use of control charts. A producer can maintain control charts with identified limits for each KPV to demonstrate that its process consistently meets the requirements.
Once a producer has control over its fixed process through a PCD plan, employs a robust data-management system, and has identified the KPVs for which it maintains control charts, it will be able to use AM to produce critical parts with consistent quality. 3DMP
Information provided by Mat Lewis and Adam Rivard, LAI International, a contract manufacturer of precision-engineered finished parts, components and subassemblies; www.laico.com. For more information, contact Adam Rivard at arivard@laico.com.
See also: LAI International Inc
Technologies:
 As the additive-manufacturing (AM) industry moves more toward end-part production, especially of critical parts, the question of how to guarantee consistent quality while maintaining a positive business case becomes more relevant. The answer to that question can be found by learning from hundreds of years of manufacturing experience, and applying that to this newer technology.


 First and foremost, shops should put a robust data-collection and storage system in place that can capture all of the data and correlate it back to a specific build, as well as to each part within a build. Then, shops can analyze the collected data, in a meaningful way, using a handful of available tools, such as statistical-analysis software that can analyze large datasets and identify correlations. This exercise can be extremely useful and save an AM shop a lot of time and effort. Many companies also are developing their own analysis software specific to AM technologies.

