A Low-Cost Approach to Sensor Application Simulation
September 1, 2009Comments
During these challenging economic times, it is good to think creatively yet with a scientific-testing mindset. I can sympathize with a toolmaker who must implement a sensor to check for short-feed in a progressive die while giving that toolmaker virtually no money for test equipment and little managerial patience with any failures. This is a classic dilemma: How to achieve sensor perfection with no margin for error? Out goes the order, “You will come up with a sensor that will check the position of this hole, at the end of the feed to within 0.010 of an inch.”
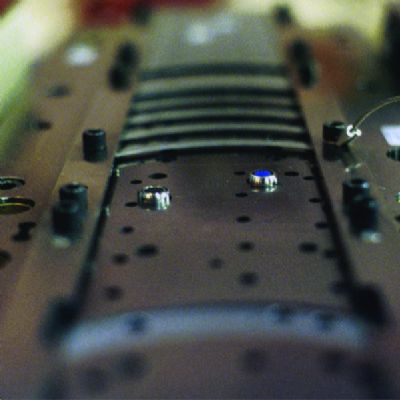
Two paths await our toolmaker. He could check for the strip position directly in a noncontact fashion by detecting the edge of the strip, or a notch or hole with the sensor’s sensing beam. The sensor could be an inductive proximity type or photoelectric, depending on the environment (oil, metal shavings, etc.), space limitations and the choice made by the toolmaker. The other approach is to probe the strip’s position by using a mechanical paddle to monitor the position of the edge of the strip and the paddle with the sensor. Either approach is viable. But how does one test the ability of the sensor to detect the position of the strip or paddle to within a 0.010 in.?
The toolmaker must be resourceful. He needs to look in the toolroom and quality lab for any device that can move and present the target within a portion of the feed motion and the tolerance of the feed. Say the strip travels 3 in. during the feed cycle. It would be good to find an existing positioning device that could travel, 1 in. or so (to simulate the approach of the target to the sensor) and has a digital readout that would be 10 times more sensitive than our tolerance of 0.010 in.—in our example, 0.001 in.
One ideal device would be a vertical mill in good mechanical shape that has a digital display with a valid calibration. It may be a manual vertical mill or a CNC vertical mill—it does not matter as long as its mechanical table mechanisms are sound and the digital readout is in calibration. Let’s use the example of a manual vertical mill. The toolmaker most probably has been using this vertical mill for years and is quite adept at manipulating the various adjustments on it. The sensor can remain stationary and the strip would be moved, or vice-versa. Even though in the real world our strip moves and the sensor remains stationary in the die, it does not matter for our experiment.
One should only use sensors for die protection that operate on low-voltage direct current. Not only is this a safer electrical environment but it allows for the sensor to be tested using a simple and portable battery-driven power supply readily available from several sensor vendors. Our toolmaker will have the sensor powered up with this power supply so that the reaction of the sensor could be monitored during the experiment. Of course the vertical mill’s motor is powered off as the experiment does not require its rotary motion. If our toolmaker decides to mount the sensor on the the nonrotating spindle of the mill and pass the target in front of that sensor using the table, table hand wheel, cross feed handle and vertical feed crank to move the target, it would not be a bad idea to have our toolmaker build spindle adapters for the different types of sensors he will be using.
The target must be presented to the sensor in exactly the same relationship to that sensor as it will be in the die. Before testing the actual strip, it would be wise to use a small block of steel to practice with. This block should be presented slowly into the sensor’s sensing field and the point at which the sensor reacts would be recorded for the X, Y and Z axes. Move the block slowly from left-to-right until the sensor responds, at various heights from the surface of the sensor. Typically, start at 0.005 in. from the surface of the sensor with the block’s centerline matching the centerline of the sensor. The block then is moved about an inch a from the edge of the sensor, then slowly moved until the sensor turns on. This is written down so that we know exactly where the sensor turns on at 0.005 in. from the sensor’s surface and the sensor’s edge relative to the block of steel. Position the block 0.008 in. from the sensor surface and repeat the experiment. Keep doing this until the sensor no longer can detect the block at a given distance from its surface. Then perform the same experiment with the actual strip. The experiment will prove or disprove that sensor’s ability to respond to a short feed of 0.010 in. and would further provide the toolmaker with the mounting location for the sensor in the die.
“But do we really need to go through this?” The answer is yes! The boss wants our toolmaker to be precise in the detection of the short feed. There will be no margin for error or tolerance from fellow employees should the die crash because the sensor failed to detect the short feed. The time that it takes to simulate the short-feed application is important.
Do not haphazardly mount sensors in your tooling without first thoroughly checking the reality of the sensor to target relationship. Only your patience will be tested—a better alternative than having to face the anger from the pressroom, fellow toolmakers and the boss when the die crashes because the wrong sensor was used. MF
View Glossary of Metalforming Terms
Technologies: Sensing/Electronics/IOT
Comments
Must be logged in to post a comment. Sign in or Create an Account
There are no comments posted. Quality Control
Industry 4.0 Applications in the Sheet Metal Forming Industr...
Eren Billur March 27, 2025
Prime Controls’ DS-Flex—a Configurable, Versatile Double-She...
December 30, 2024