Why won’t a long-duration weld time produce a better weld, when it would seem that “cooking” a resistance weld with extra heat and time would add to its strength? Just like baking a cake, the right PCT recipe is critical to achieving a successful outcome. While too little current-flow time will result in a weak weld, trying to overcome this issue using excessive weld time causes the heat-affected zone to grow too large, which weakens the joint and can produce an excessive indentation, or expulsion.
The formula characterizing the RSW process: H = I2RT, where:
H = heat
I = current passing through the weld joint, measured in secondary welding amps
R = the resistance of the material and contact surfaces
and T = time, or the duration of current flow measured in cycles (Hz).
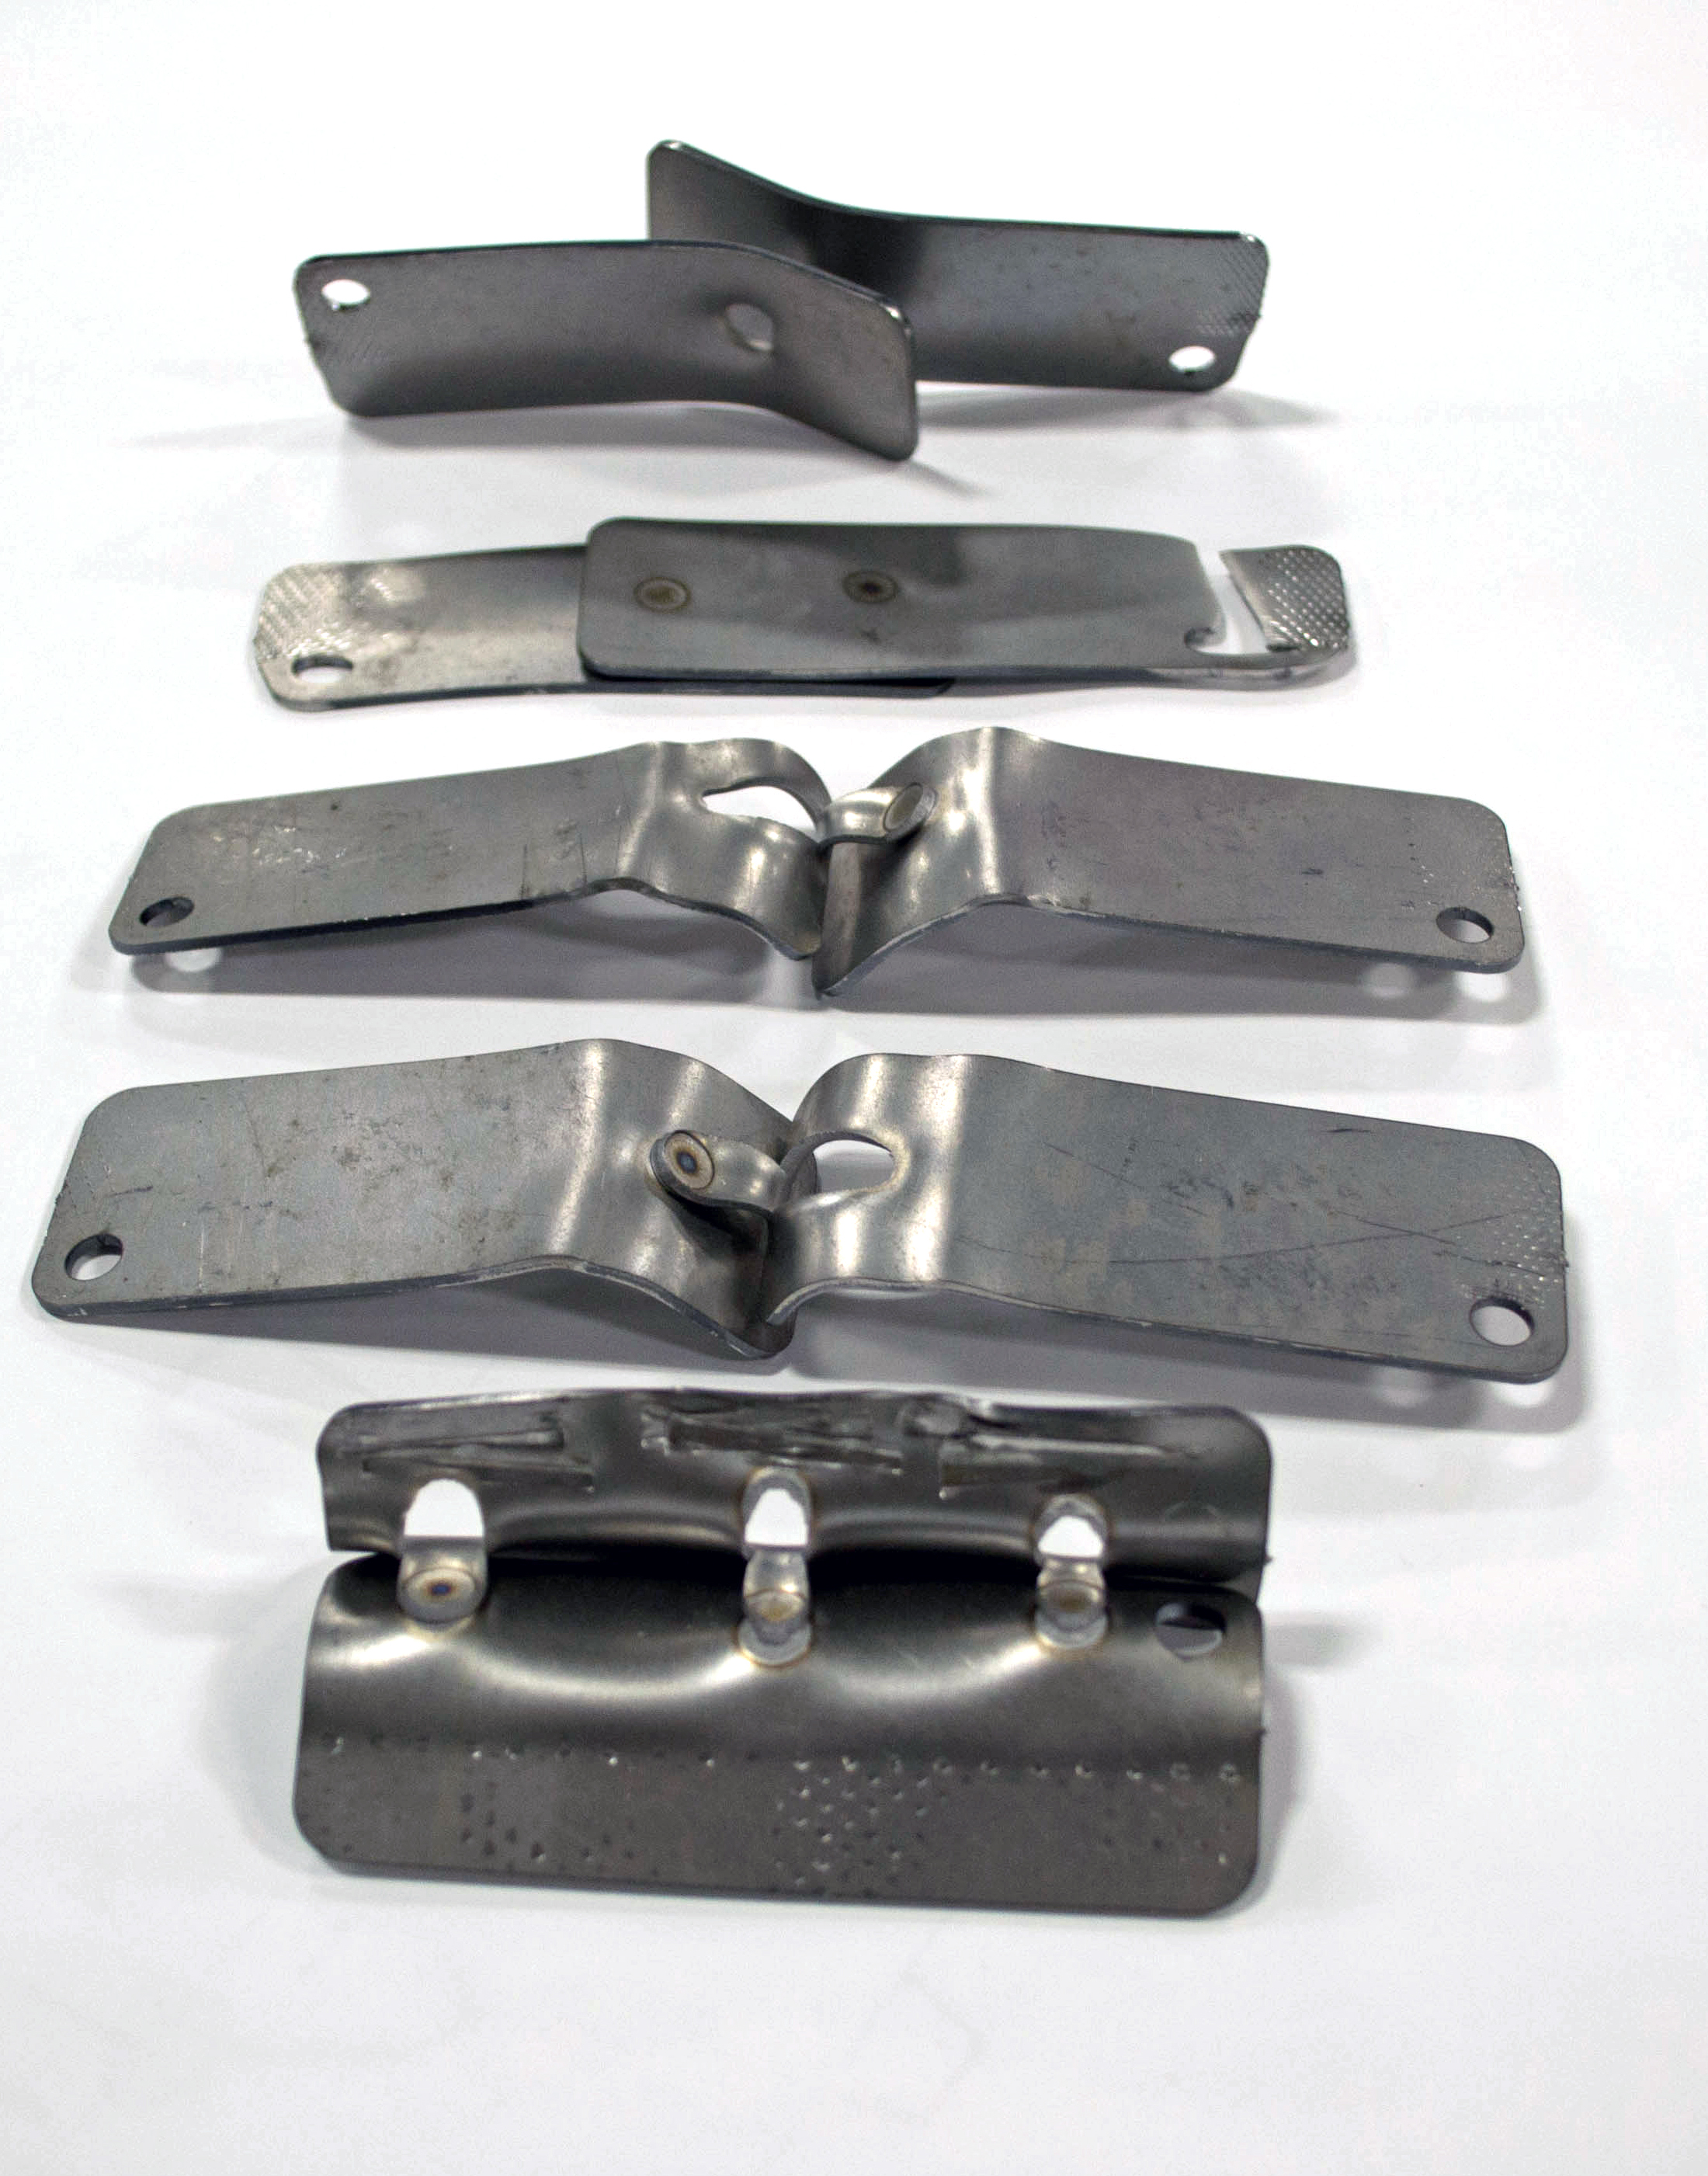 |
| The RSW process looks simple, but fabricators must understand well, and control, the process variables in order to achieve the desired results: a weld stronger than the parent material (illustrated here by a series of pull-test samples). |
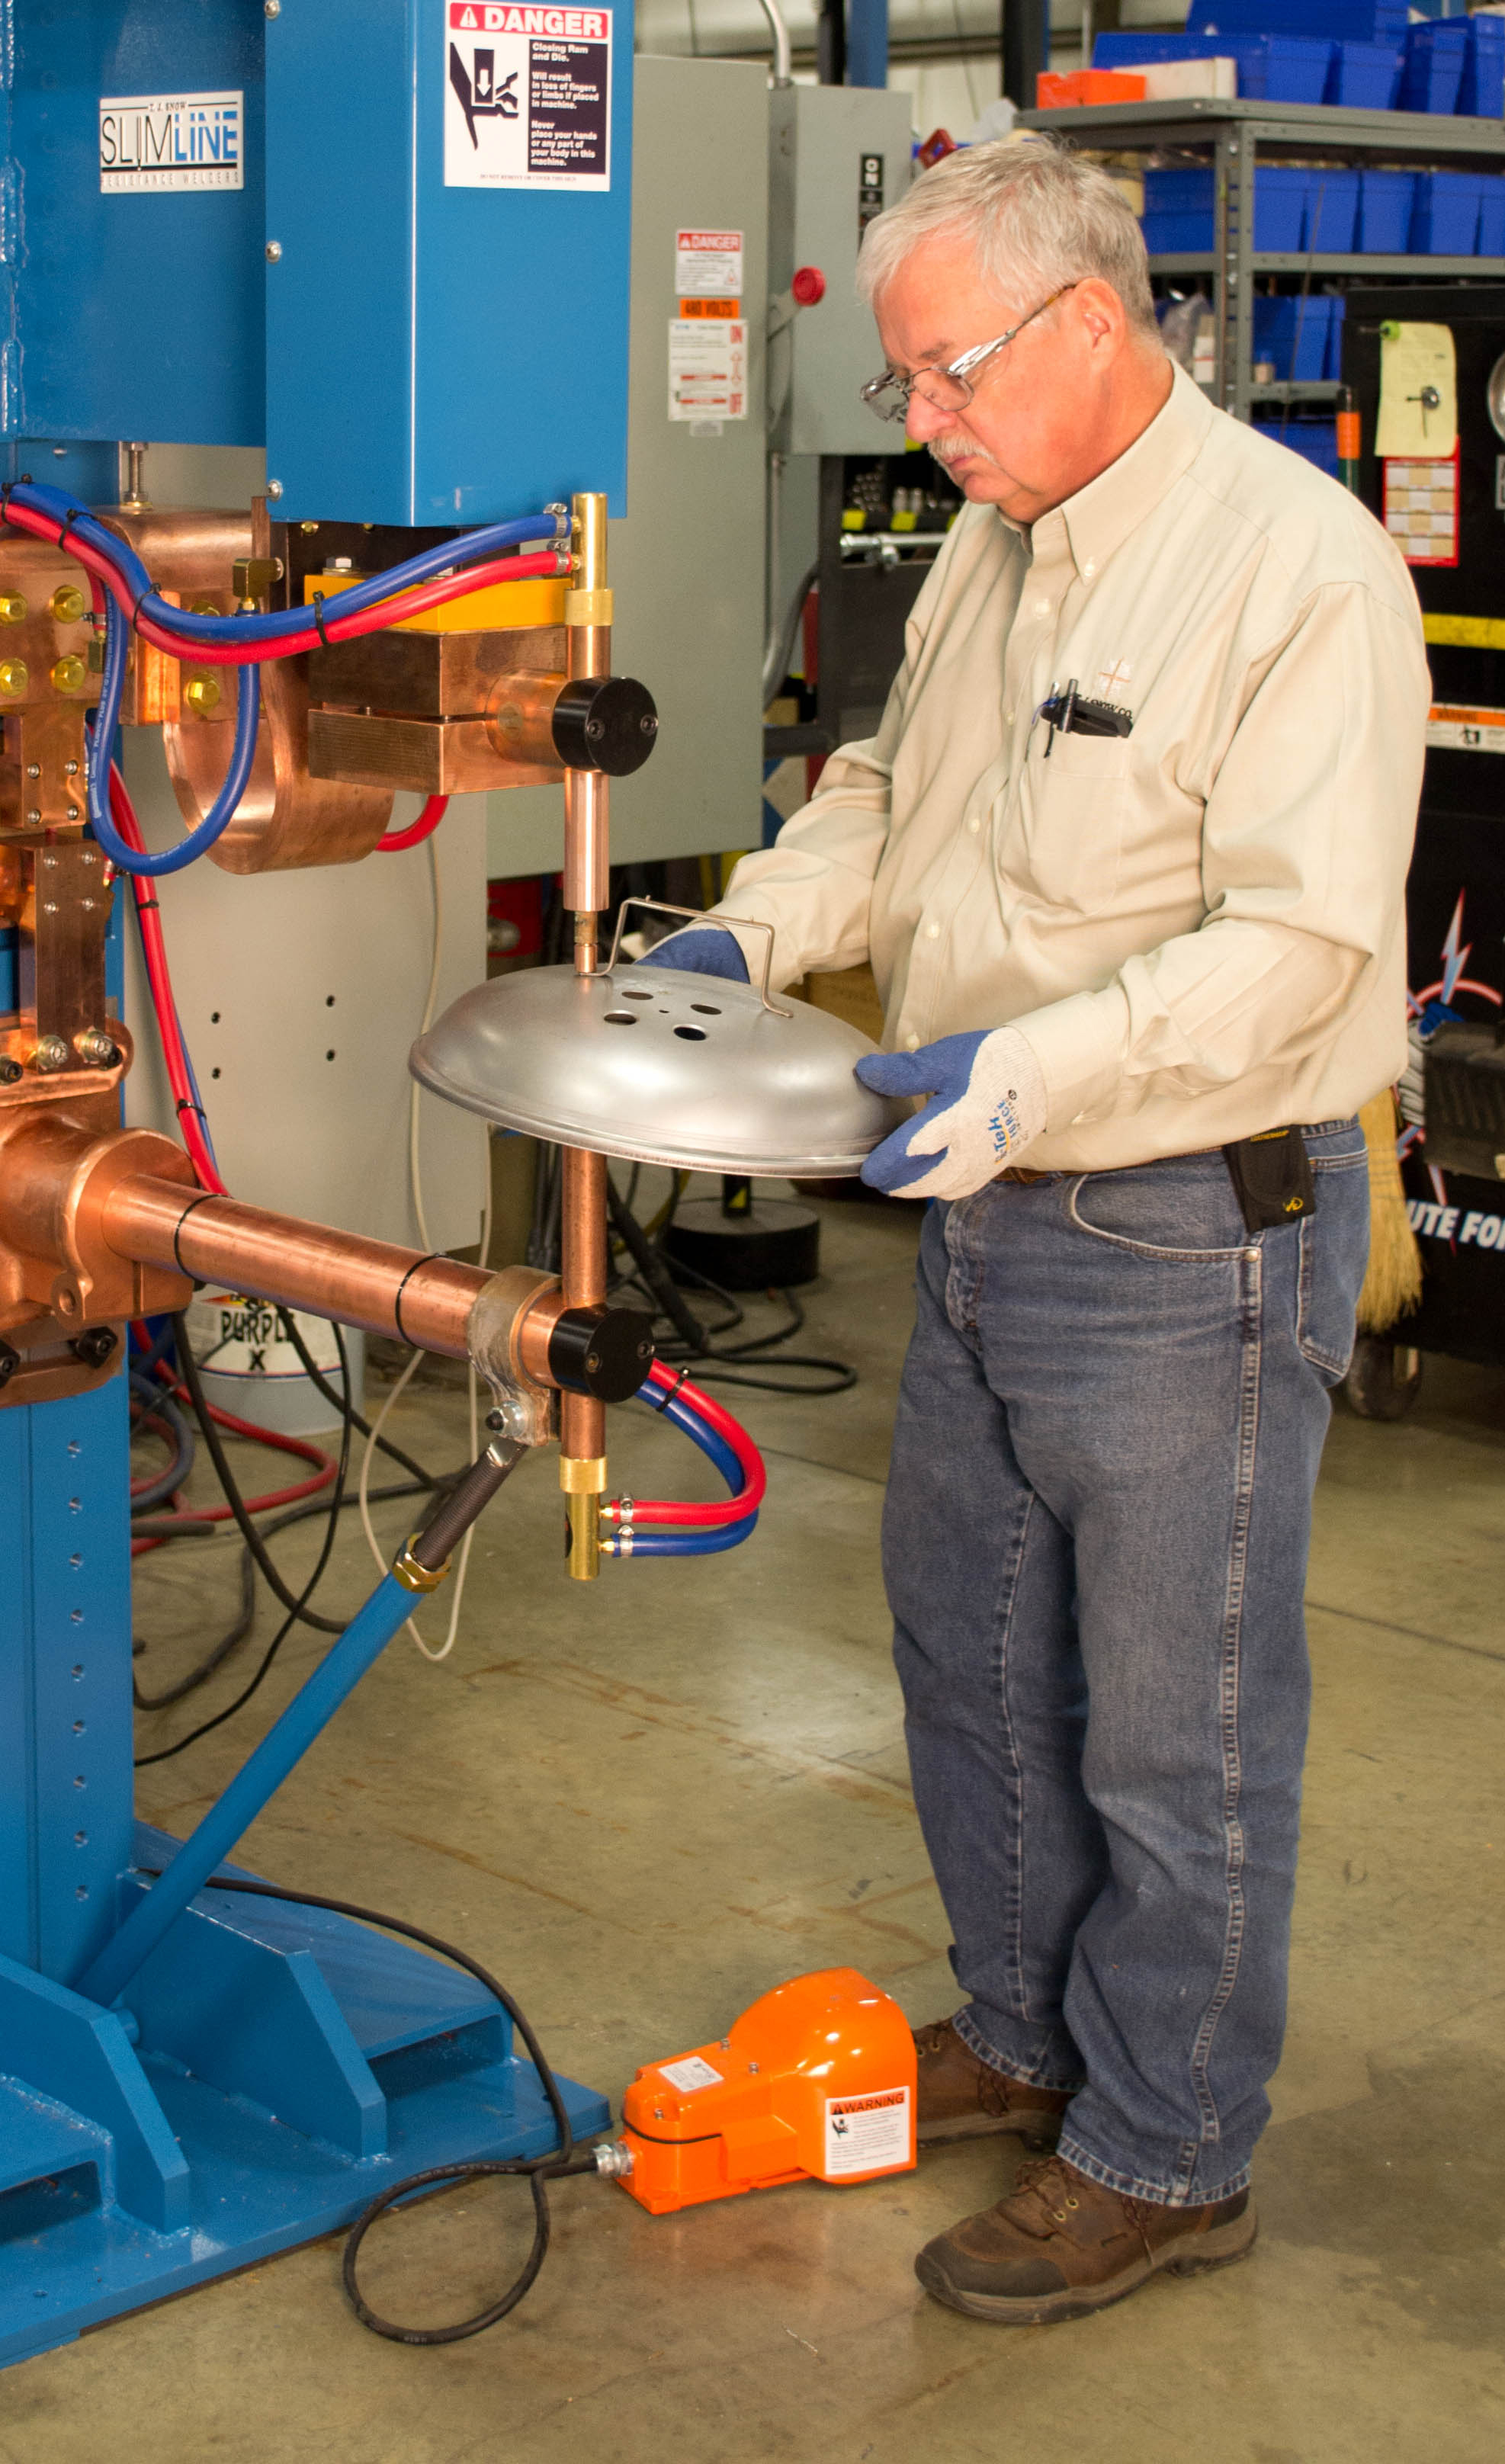
To optimize the RSW process, fabricators should use high secondary welding-current settings, typically 5000 to 20,000 A. Current produced by the welding machine’s transformer is conducted to the workpiece via copper arms and welding tips (electrodes) at a very low secondary voltage, typically 3 to 12 V.
More About Weld Time
Think of an overly long weld time with too little current this way: No matter how long you leave a pan of water on the stove, you cannot make the water boil without sufficient heat. Or, think about baking biscuits: To end up with consistent, delicious biscuits, we must follow a recipe that calls for carefully measured ingredients baked for a specific length of time.
The same is true with the RSW process—fabricators must follow a recommended recipe (weld schedule) that specifies the proper amount of PCT. The American Welding Society (AWS) and other sources publish recommended weld schedules for most combinations of metal alloys and workpiece thicknesses.
For example, when welding two pieces of 18-gauge low-carbon steel, the recommended machine settings are 660 lb. of pressure, 9600 secondary amps and eight cycles of weld time. (Note: Since most RSW machines do not display these variables, fabricators should use a weld monitor that displays weld current and time, and an electrode-force gauge during machine setup).
Long weld times often are used when trying to correct a problem with weld-joint strength. However, if your weld times are too long, that variable is not in the correct “portion” to weld the material, according to the PCT recipe for the workpiece material.
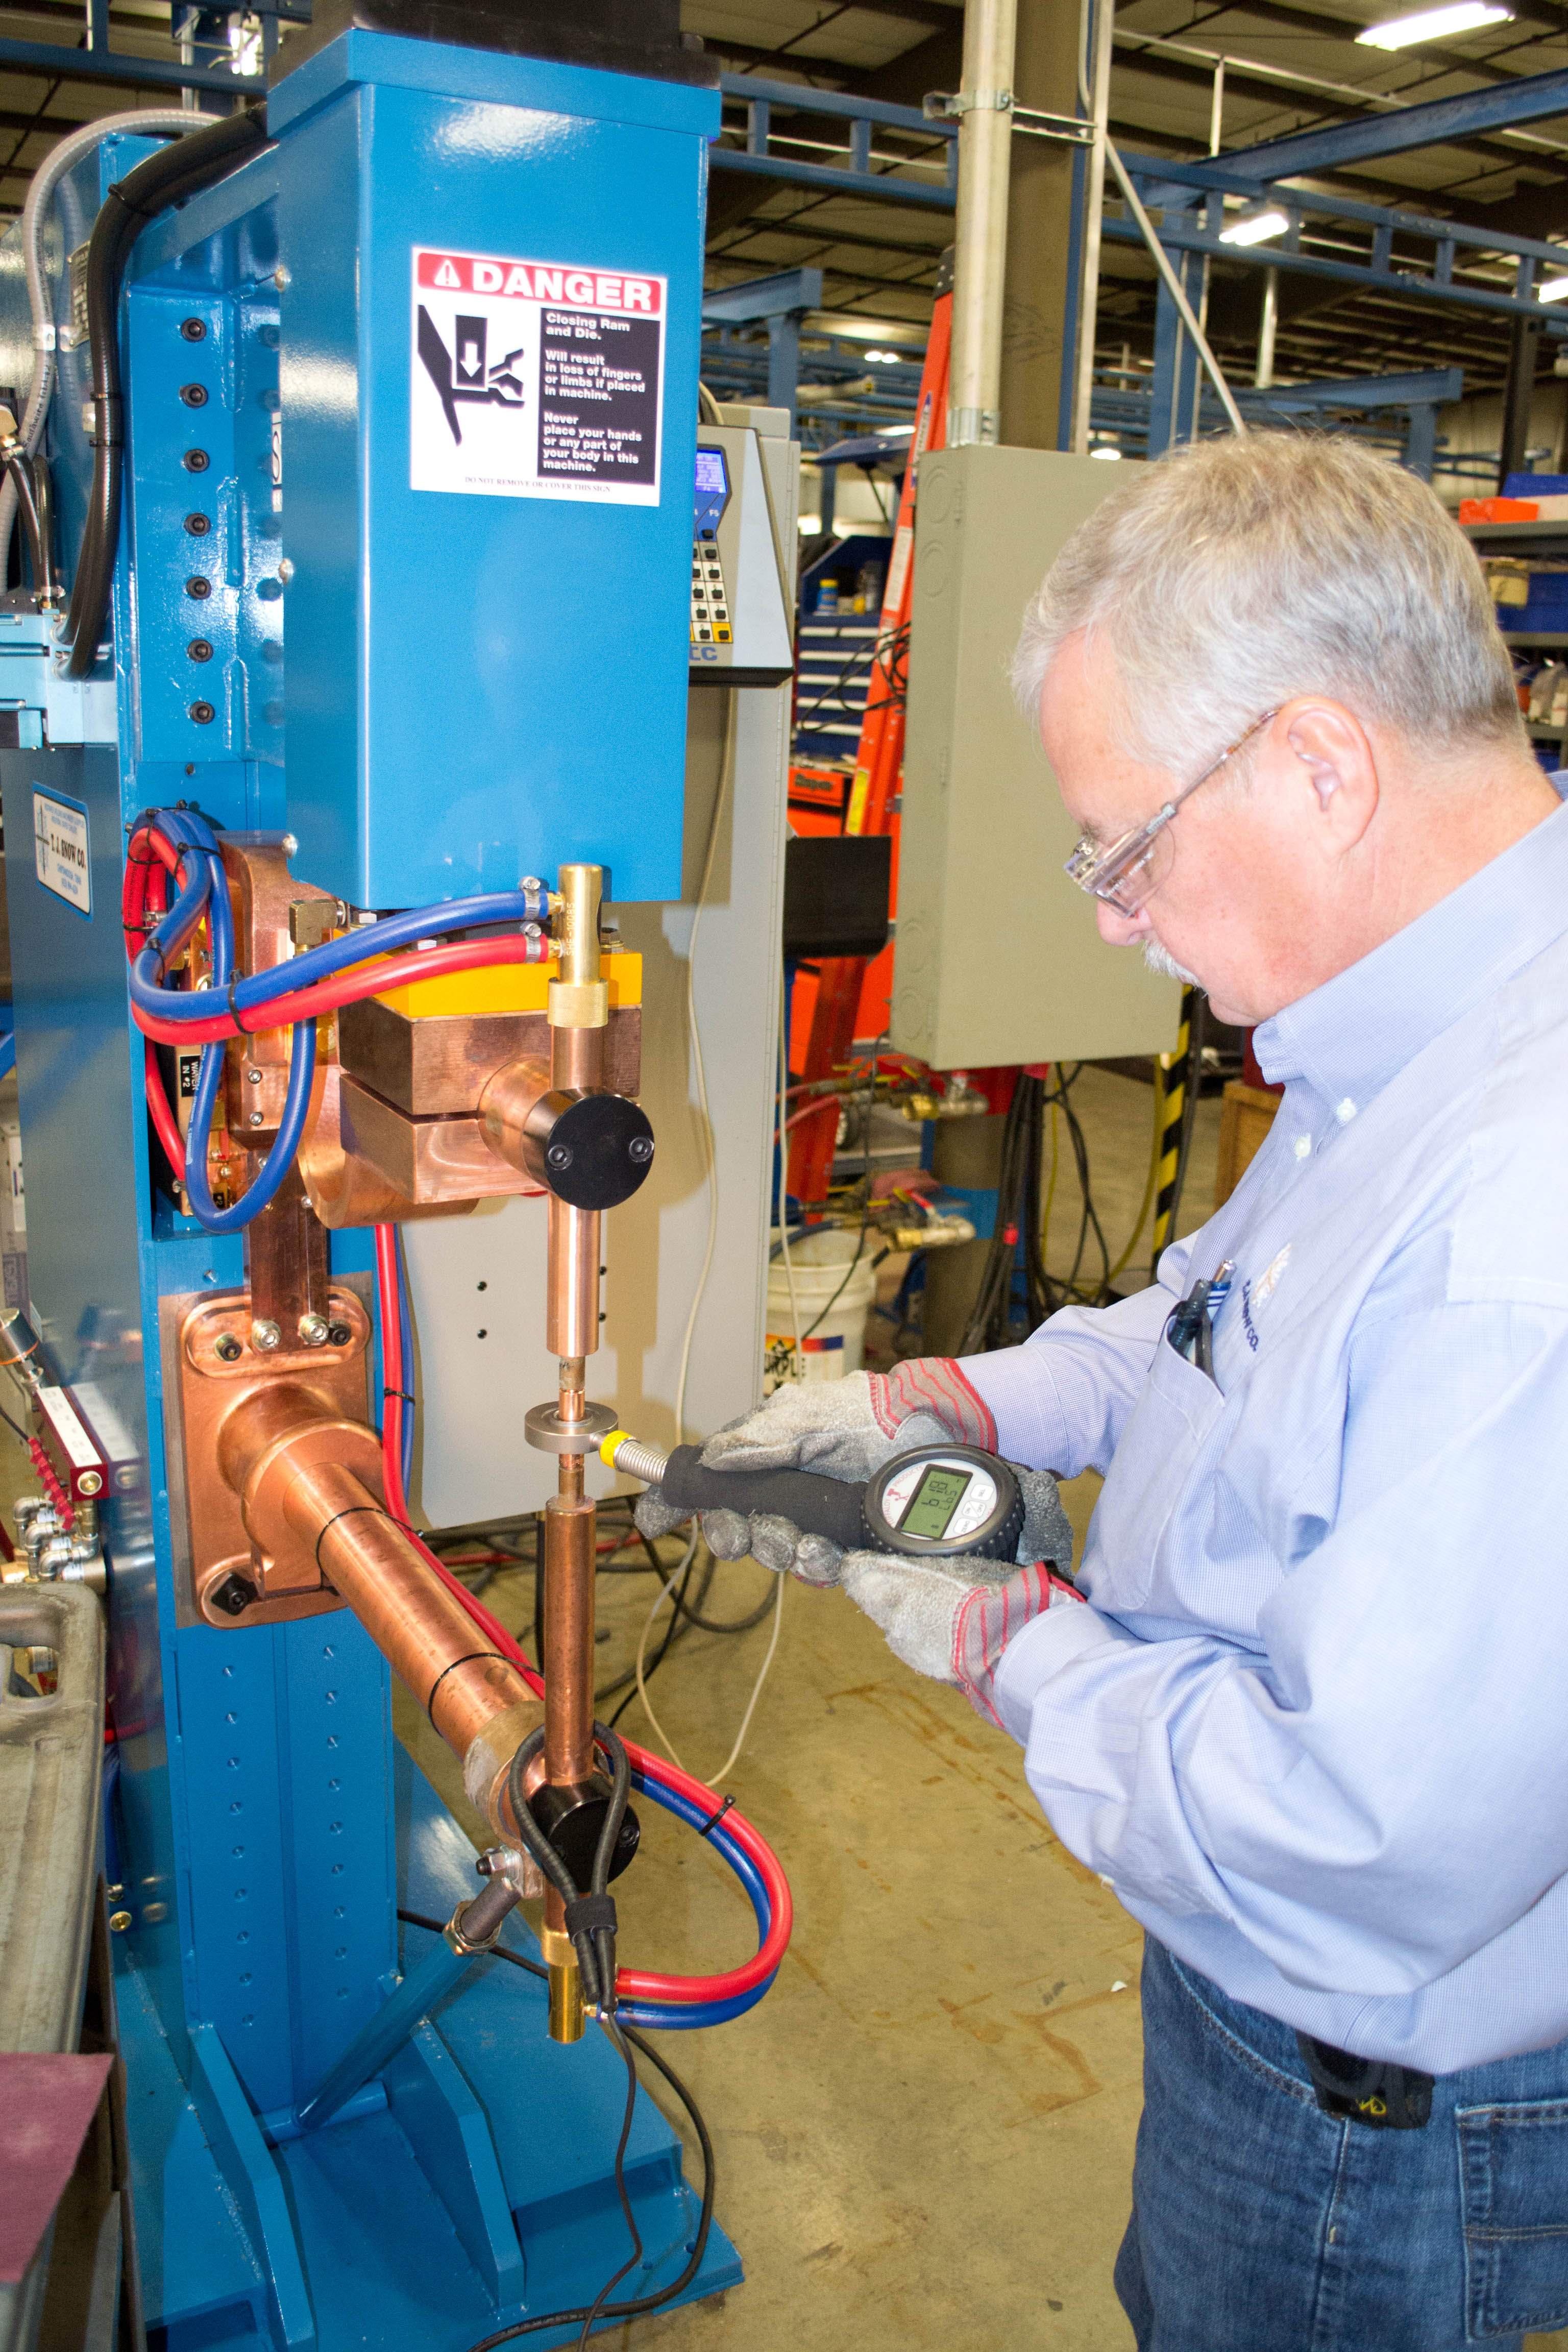 |
| Since most RSW machines do not display the critical process variables, fabricators should use an external amperage meter and force gauge during machine setup. |
In addition, excessive current or insufficient pressure may cause the spot weld to “boil over”— called weld expulsion. Excess weld pressure reduces interfacial resistance and results in a weld that’s too cold. Attempt to overcome this by adding more weld time and you still will not bring the material to a molten state. Instead, you will cause excessive heating in the area surrounding the weld—the heat-affected zone—which may affect weld strength.
Interfacial Resistance and Heat
The heat required to create each spot weld is generated by the base material’s resistance to current flow. Copper used for the RSW machine’s conductors is considered to have a value of 100-percent conductivity, while the conductivity of mild steel is approximately 10 percent. So, with a given amount of current passing through equal volumes and sectional areas of copper and steel, the resulting heat generated in the steel will be approximately 10 times greater than in the copper.
All of the resistance values in the weld circuit are considered to be in series, and the heat generated at any location is proportional to the value of the resistance at that point. We can assume that the faying surface (where the two workpieces come into contact) has the highest resistance and therefore will generate the most heat. This interfacial resistance should generate enough heat to bring the faying surfaces to a fusion temperature of approximately 2700 F.
If the heat generated at any one spot is proportional to the value of the resistance at that point, how can we control the resistance? In an electrical circuit, pressing contacting surfaces together with high force reduces resistance and, therefore, heat generation. So, by varying the force we can increase or decrease the resistance and control the amount of heat in the weld joint.
At the same time, we can control current passing through the weld joint by adjusting the transformer’s tap switch (if equipped) and the percent-current setting on the machine’s electronic control. Electrical current, passing through the resistance of the weld-zone interface, creates the required heat; application of the electrode pressure on the weld joint forges the molten material. As a result, the molecules fuse together to form the weld nugget.
The Rest of the Story
Getting back to our customer who believed that an extremely long weld time was the answer to producing strong spot welds, we proved through destructive testing that only eight cycles of weld time would produce a much stronger weld joint than the 73 cycles of weld time being used prior to our arrival.
In fact, while the “over-baked” assembly broke apart easily when hammered, our properly welded part never did break despite the operator’s best efforts to prove us wrong. We left the customer happy and confident in the RSW process, optimized with a shorter weld time that increased his production rate; produced consistently high-quality welds; and improved welding-electrode life. MF
See also: T. J. Snow Company
Technologies: Welding and Joining


 Ray Michelena